How to install the CEA on Windows - part 2
In part 1 of this series, I showed you how to do a basic installation of the City Energy Analyst (CEA). For Researchers and Developers that would like to edit the source code of the CEA, this post explains how to set it up.
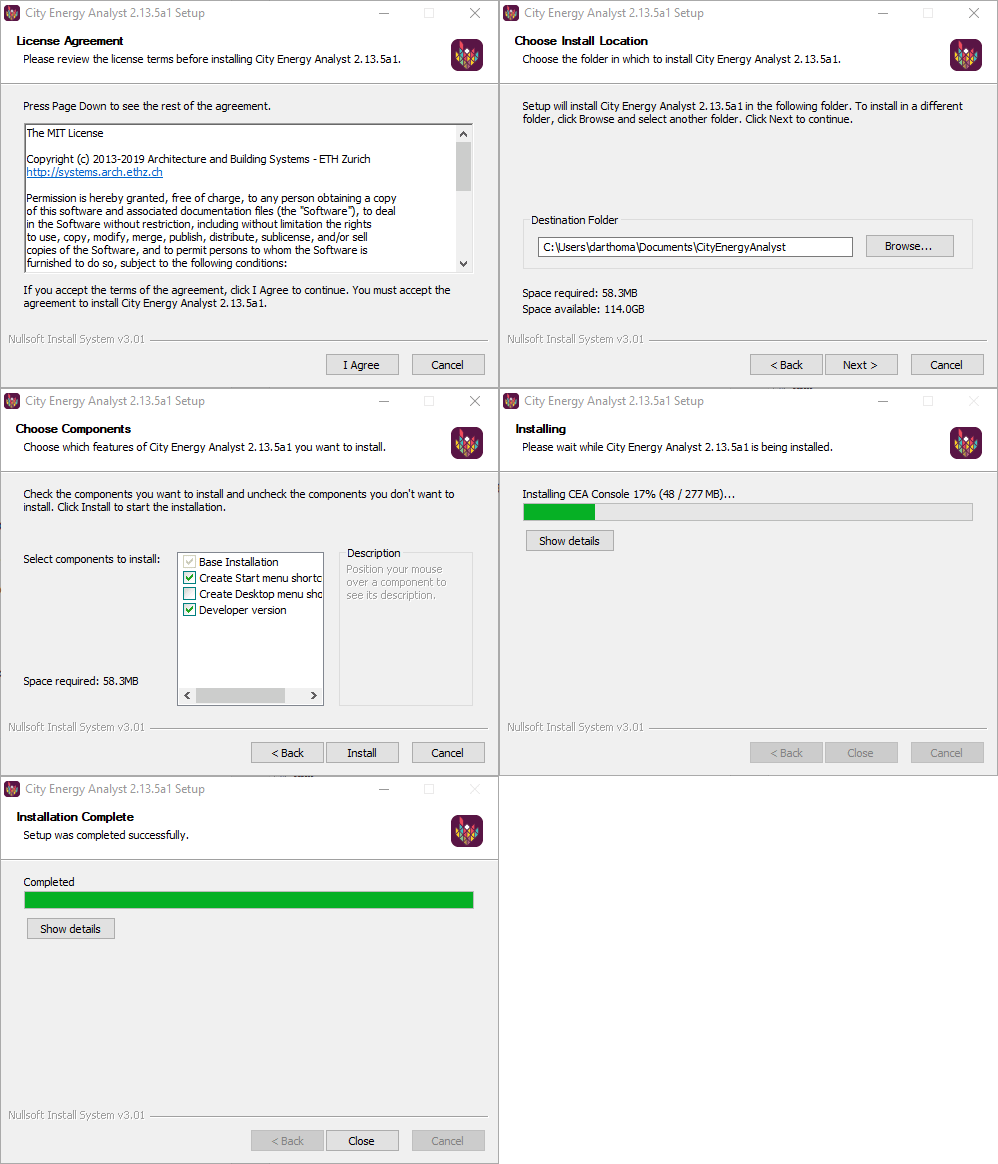
The installation for researchers and developers follows the same structure as that for students and practitioners. Download and run the CEA Installer. Make sure to select the “Developer version” component on the “Choose Components” page.

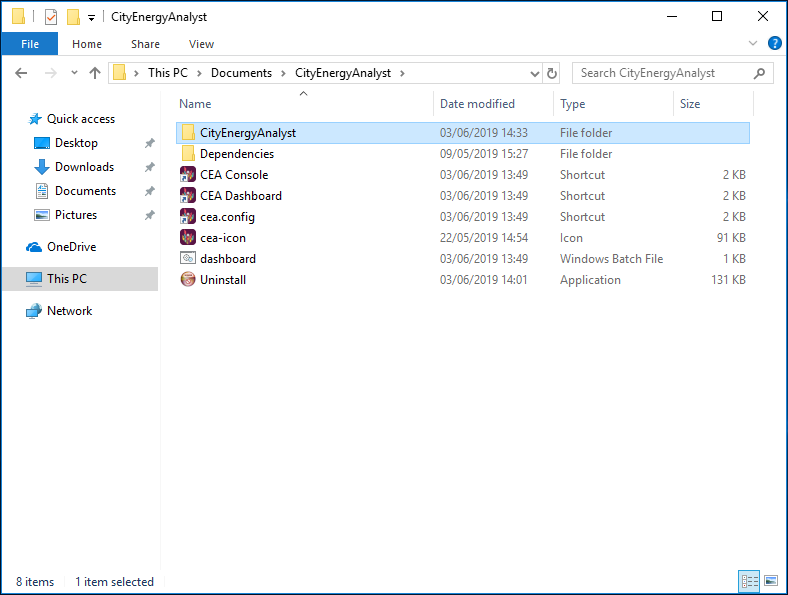
The “Developer version” installs in addition to the “Base Installation” a subdirectory “CityEnergyAnalyst” inside the installation folder. This is a clone of the CEA git repository and contains the source code of the CEA.

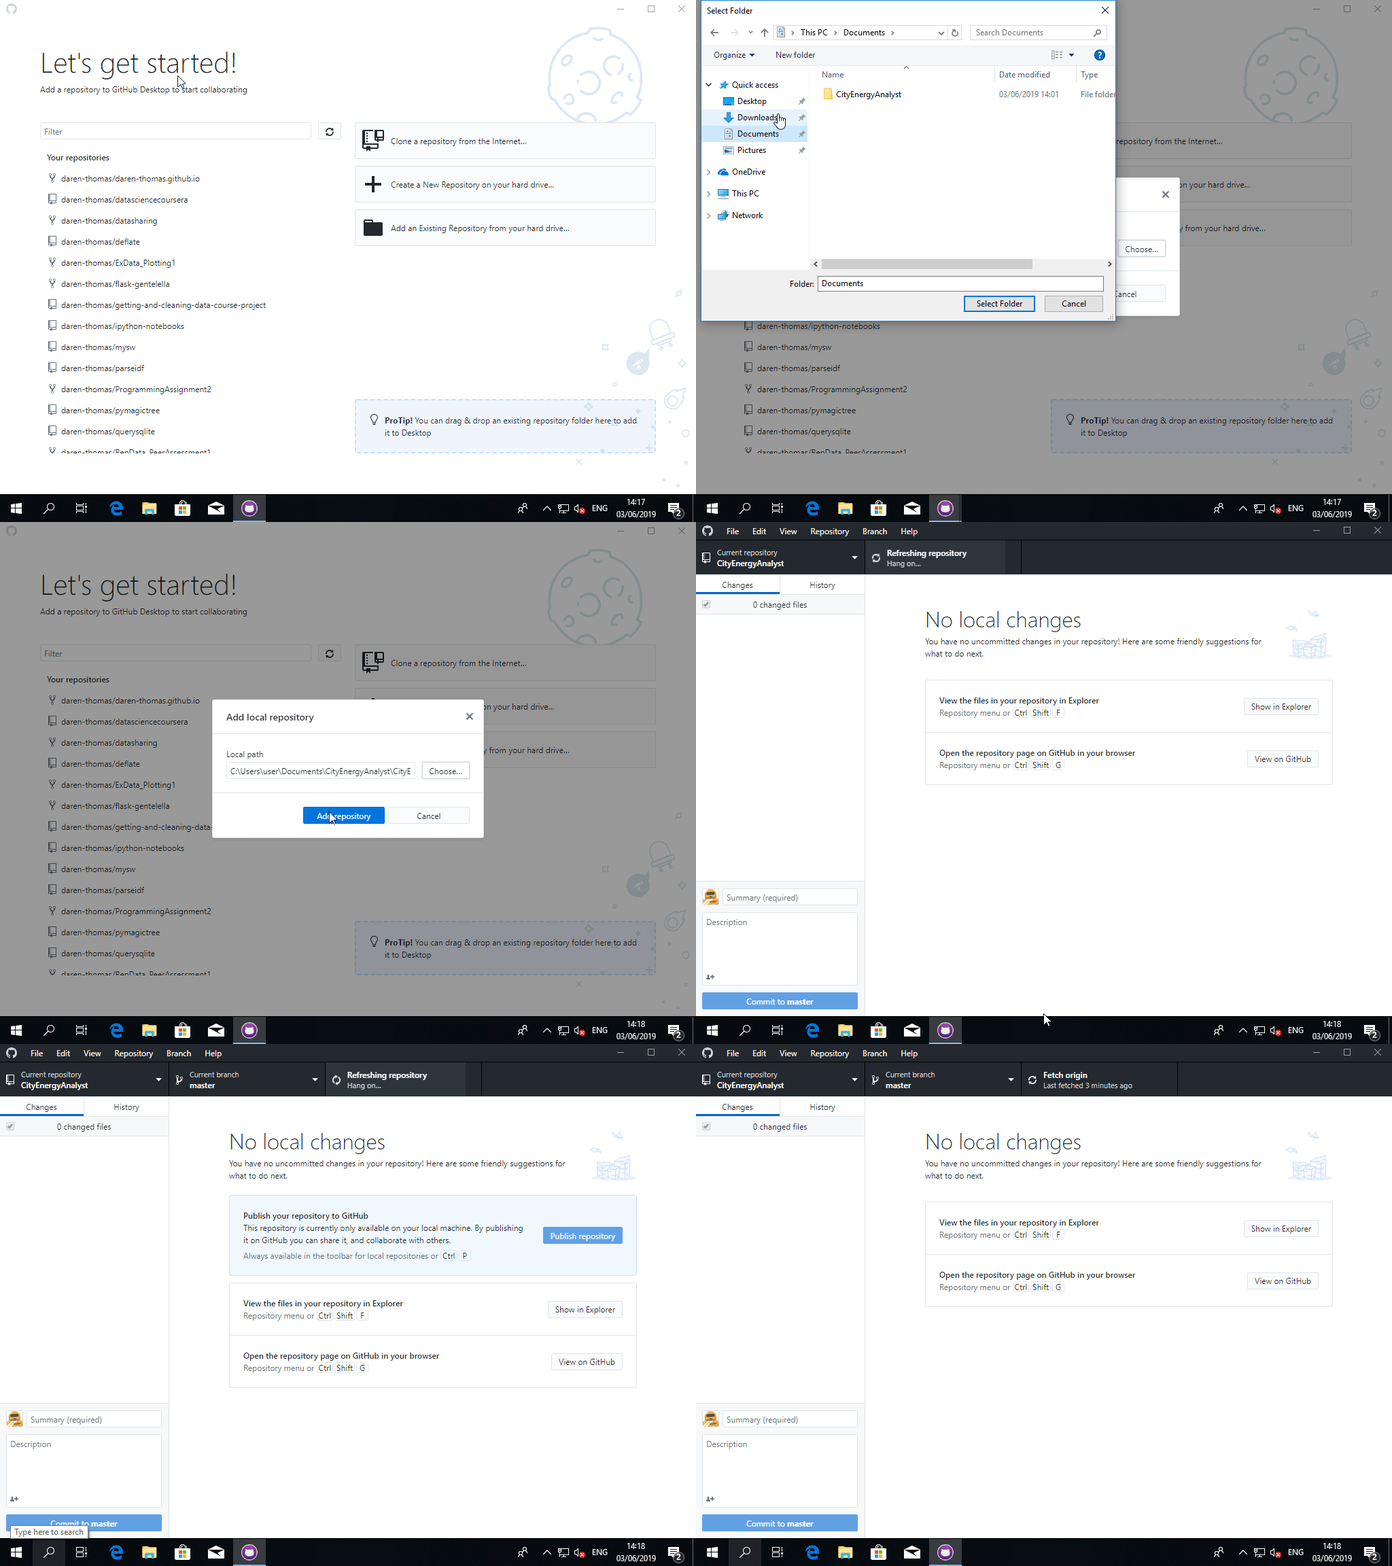
If you would like to switch to another branch, pull changes from origin or push your own changes, use the git command in the CEA Console or add the repository in GitHub Desktop: Select “File -> Add local repository…” from the menu (or press Ctrl + O) and navigate to the installation folder (C:\Users\{user}\Documents\CityEnergyAnalyst) and select the folder “CityEnergyAnalyst”.

Using git and GitHub Desktop is out of scope for this post - check out the GitHub Desktop documentation for more information on how to work with GitHub repositories. To stay on the bleeding edge of the CEA development, frequently “pull” the master branch.
The Developer version of the CEA is set up to use the repository. For the geeks among you: pip install -e %USERPROFILE%\Documents\CityEnergyAnalyst\CityEnergyAnalyst set’s up the repository to be “editable”.
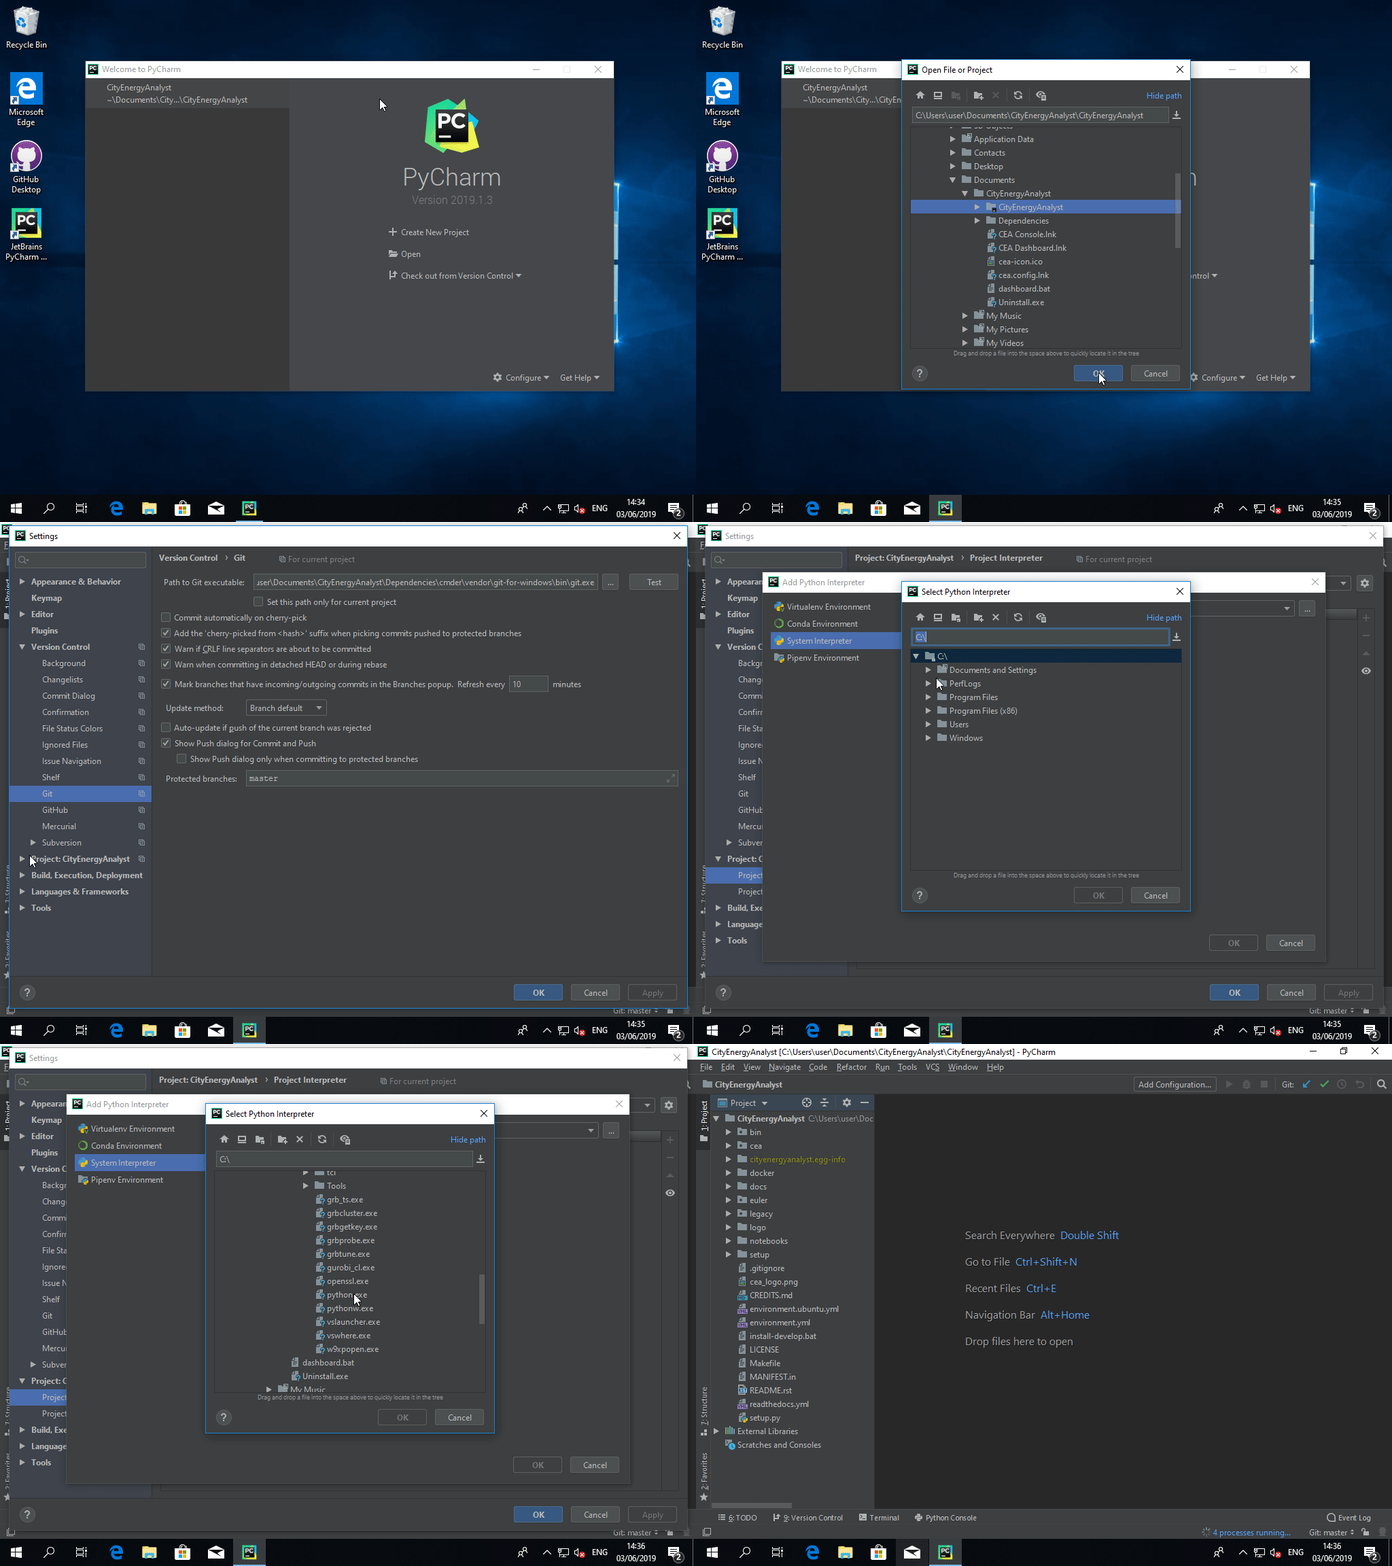
If you would like to modify the source, we suggest using the PyCharm IDE - but any text editor will do. In PyCharm, open the repository (C:\Users\{user}\Documents\CityEnergyAnalyst\CityEnergyAnalyst). You will need to set the Project Interpreter to C:\Users\{user}\Documents\CityEnergyAnalyst\Dependencies\Python\python.exe
